




























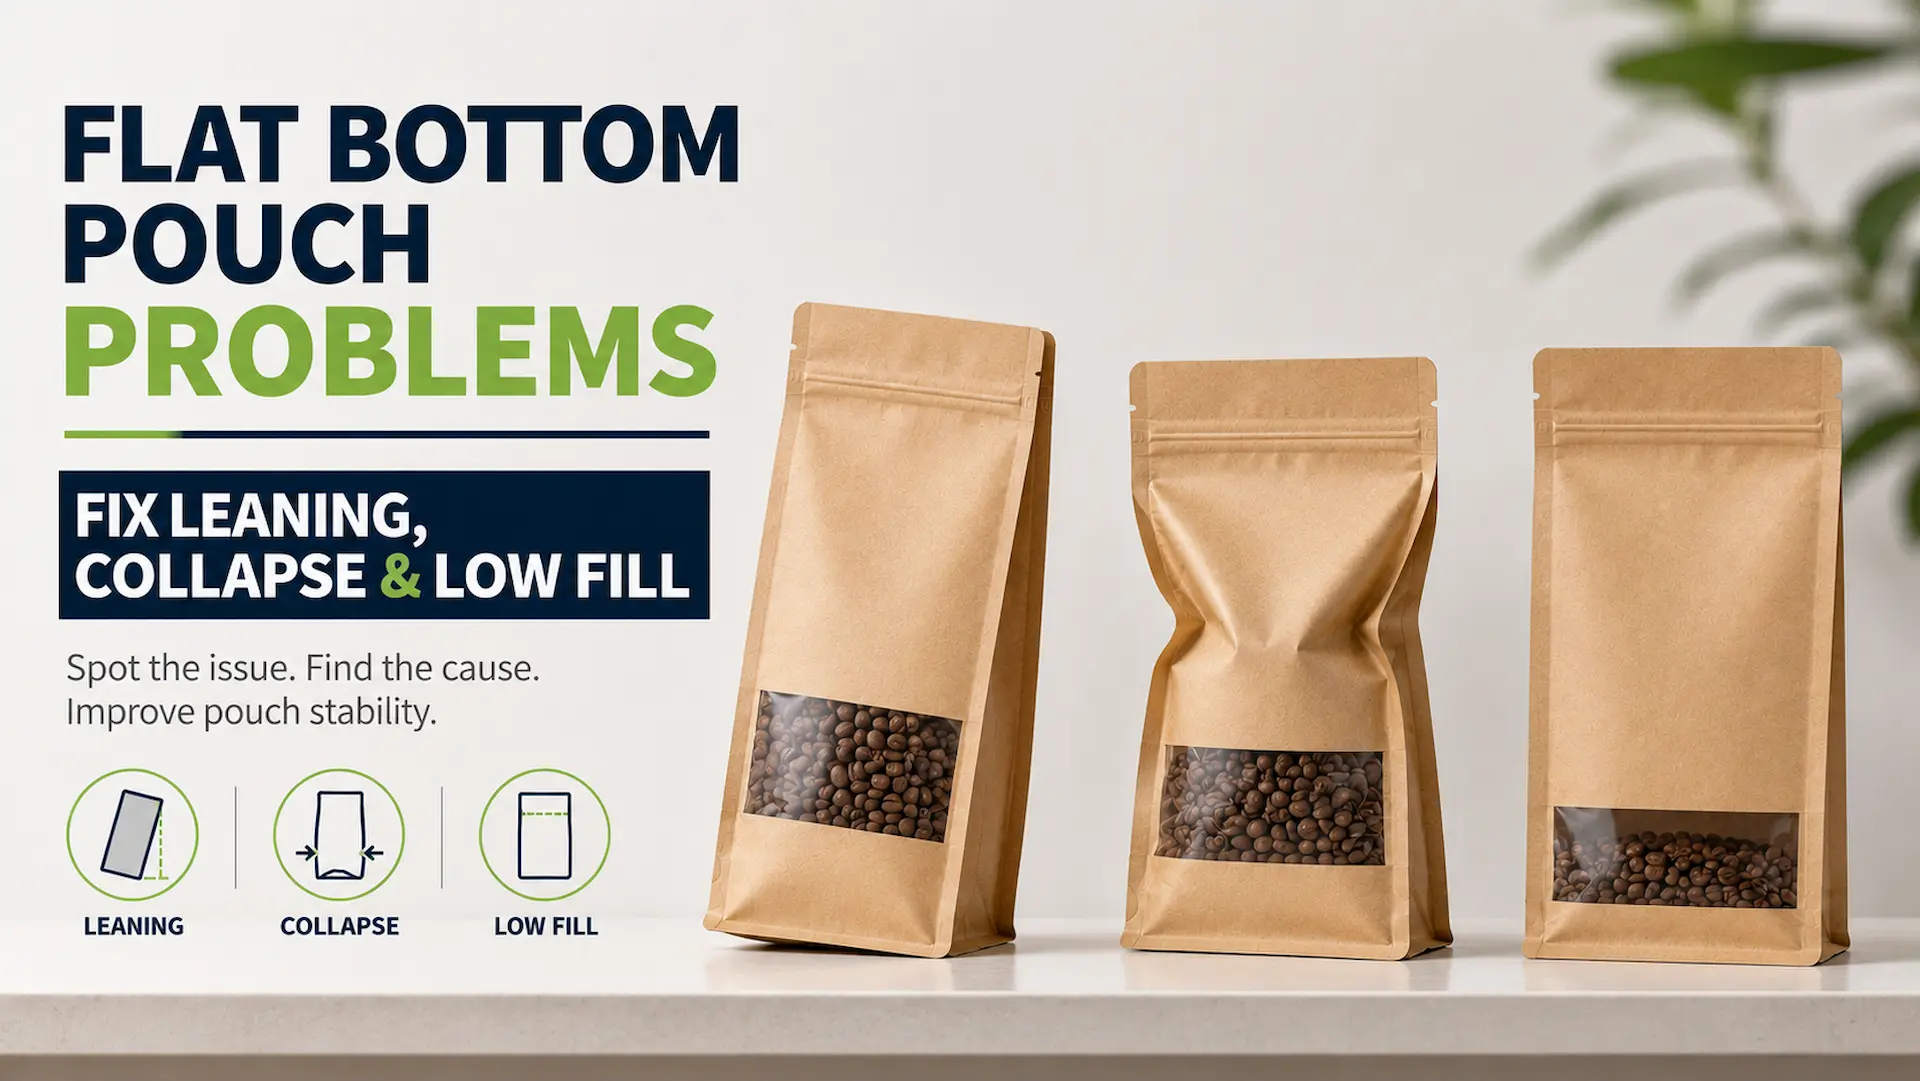
A flat base looks like it should guarantee a pouch stands up straight every time. In practice, plenty of brands open a fresh case of pouches and find one leaning against its neighbor, another slumping at the top, or a whole batch that looks half empty even though the scale says the weight is right. None of that means the pouch is faulty or the whole batch is bad. It usually means something in the size, fill, or film doesn’t quite match the product sitting inside it.
This guide walks through the three problems in the title, leaning, collapsing, and looking underfilled, and shows what actually causes each one. You’ll get a quick way to check which part of the process is to blame, practical fixes for stock you already have on hand, and what to change before your next production run goes out. By the end, you’ll know exactly what to test before you sign off on a pouch design.
Identify the Flat Bottom Pouch Problem First
Before changing your pouch design, match what you’re actually seeing to the table below. Guessing at a fix without diagnosing the real cause usually means paying for a change that doesn’t solve anything, and sometimes introduces a new problem on top of the old one.
| Visible Problem | Most Likely Cause | First Check |
| Pouch leans to one side | Uneven filling or a gusset not opening fully | Compare product distribution and both gussets |
| Pouch tips over easily | Tall pouch, narrow base, or high center of gravity | Review height, width, and gusset depth |
| Panels collapse inward | Soft laminate, low fill support, or oversized pouch | Check fill level and film stiffness |
| Pouch looks underfilled | Wrong size, low-density product, or settling | Measure the actual settled product volume |
| Pouch stands then falls later | Product movement, vibration, or transit compression | Test after settling and a shipping simulation |
| Bottom doesn’t sit flat | Gusset wrinkles or uneven seals | Inspect all four bottom corners |
| Only some pouches stand right | Inconsistent fill weight or converting variation | Compare samples across a production run |
Once you know which row matches what you’re seeing, jump to the matching section below. Each one covers the specific causes and the fix that actually applies.
Why Your Flat Bottom Pouch Leans (and How to Fix It)
Leaning almost always means the pouch’s center of gravity isn’t sitting where the base can support it. Once you know which of these is happening, the fix is usually straightforward.
The Pouch Is Too Tall for Its Base
A tall, narrow pouch with a small footprint gets top-heavy fast, especially once a dense product sits high inside it. Shallow side gussets make this worse. They don’t give the base enough width to counter the height above it. A tall, narrow coffee pouch built for shelf presence is a common example. It looks great empty, then leans the moment it’s filled with a heavy roast.
This usually comes down to one of a few things:
- Extra pouch height added for shelf presence, not for fill capacity
- A narrow width that can’t counter the height above it
- A shallow side gusset that leaves the base too small for the fill weight
- A dense or heavy product sitting high inside the pouch
To fix it, cut any height you don’t actually need, and widen the base or deepen the gusset instead of adding more height. Test the pouch at your lowest, target, and highest expected fill weights. A pouch that stands fine at one weight can still lean at another.
The Product Is Filling One Side More Than the Other
If the filling nozzle sits slightly off-center, or product drops in too fast, more weight can end up on one side than the other. This tends to show up more with chunky products like trail mix or pet treats than with fine powders, since bigger pieces don’t redistribute themselves once they land.
A few common causes worth ruling out:
- The filling nozzle isn’t centered over the pouch opening
- Product drops in too fast for it to settle evenly
- Large or irregular pieces collect on one side
- The pouch is held at an angle during filling
Center the product drop, slow the fill if needed, and give the product a moment to settle into the base before sealing. Comparing a hand-filled sample against a machine-filled one usually shows fast whether the filler itself is the problem.
A Gusset or the Bottom Panel Isn’t Sitting Right
Both side gussets need to open evenly for the base to sit flat and balanced. Static between film layers, an uneven fold, or product entering the pouch before the gusset has fully opened can all leave one side flatter than the other. A wrinkled or twisted bottom panel causes the same lean, just from the base itself rather than the sides, and it’s often easier to spot on an empty pouch than a filled one.
Lay a few empty pouches flat and compare both gussets and all four corners before you fill anything. If one gusset consistently stays folded or one corner lifts off the table, raise it with your supplier as a converting issue rather than a filling one.
The Film Is Too Soft to Hold the Pouch Upright
A laminate can have excellent barrier protection and still lack enough structural stiffness for the pouch’s size and fill weight. This is a different property than thickness. A thick film can still be too flexible for a tall or heavy pouch, while a thinner one engineered for rigidity can sometimes hold its shape better.
Test the exact laminate you plan to use in production, not a prototype made from a different material. If the film keeps leaning under normal fill weight, a stiffer laminate or a reinforced base panel usually solves it. Custom sizing can also help if the base itself needs to be wider for the product you’re packing.
Quick fixes for pouches you already have:
- Check all four bottom corners sit flat on a hard surface
- Compare how far each gusset has opened compared to the other
- Center the product inside the pouch by hand before it goes on display
- Reduce pouch height where you can without cutting into fill capacity
- Confirm the film has enough stiffness to hold the shape once it’s loaded
- Retest the pouch after it’s been moved or shipped, not just fresh off the line

Why Your Flat Bottom Pouch Collapses (and How to Fix It)
Collapse usually means the pouch doesn’t have enough support, from the product, the film, or the base, to hold its box-like shape. It’s a different problem from learning too. A collapsed pouch can sit dead center on the shelf and still look wrong.
Not Enough Product to Support the Panels
The product itself does a lot of the work holding the front, back, and side panels in position. A pouch sized for a 2 lb bag but filled at 1 lb will almost always show this.
When the fill level runs too low, you’ll typically see:
- Side panels folding inward instead of staying upright
- The upper part of the pouch going loose or soft
- The base not opening all the way into its flat shape
- The pouch losing its rectangular, box-like look
Match the pouch size to your actual fill weight rather than sizing for the biggest version of the product line. Test your lowest normal production weight specifically, since that’s where collapse shows up first, well before it appears at the target or maximum fill level.
The Pouch Is Bigger Than the Product Needs
Picking a size straight from a general capacity chart often means an oversized pouch, because two products with the same weight rarely take up the same amount of space. This gets worse if the pouch was originally sized around a different product, or if extra height was added just for shelf presence rather than to fit the actual fill.
Measure your product’s actual volume, then measure it again after it settles. Only finalize dimensions once you’ve tested the real net weight in a physical sample, not a rendering or a spec sheet.
The Film or Gusset Construction Can’t Hold the Shape
Large, tall panels need real stiffness behind them, and a soft outer film or a flexible mono-material structure can leave them sagging under a heavy product. Misaligned gussets, unequal panel widths, or a twisted seal have a similar effect, just from a construction fault rather than the material itself.
Lay empty pouches flat and compare both sides for equal width and symmetry. If the film is the issue, look at the full laminate structure rather than just the micron thickness, and consider a reinforced base or panel material for heavier products like protein powder or dry pet food.
Settling and Shipping Pressure Wear the Shape Down
A pouch that stands correctly right after filling can still collapse later. Powders, coffee, grains, and small granules often settle into less space once they’ve been vibrated or handled, which removes the internal support that was holding the panels up. Tight case packing, too much empty space in the carton, or heavy cases stacked above can add pressure that finishes the job, especially on pouches near the bottom of a pallet.
Important note: A filled pouch that looks structurally sound on day one doesn’t guarantee it’ll still look that way after a real shipment. Vibration and stacking pressure do their damage slowly, so a pouch that passes a same-day check can still fail a week later. Test the pouch inside your actual shipping case, with normal stacking and vibration, before you approve a full production run.
Quick fixes for a collapsing pouch:
- Confirm the actual fill weight matches what the pouch size was built for
- Measure both fresh and settled product volume before finalizing anything
- Check laminate stiffness, not just thickness, against the finished panel size
- Review gusset symmetry on empty samples before you fill a single one
- Test how the pouch holds up under real case compression, not just on a table
 Why Your Flat Bottom Pouch Looks Underfilled (and How to Fix It)
Correct net weight doesn’t always look like a correctly filled pouch, because weight and volume aren’t the same thing.
Product Weight and Product Volume Aren’t the Same Thing
Two products at the exact same weight can fill completely different amounts of a pouch, which is why a “one size fits every product” chart rarely works out in practice. A few examples make this clear:
- Fine powders compact tightly and take up less space
- Whole coffee beans take up more space than the same weight in ground coffee
- Lightweight snacks trap more air between pieces
- Irregular or chunky pieces leave gaps that a uniform product wouldn’t
Record your product’s actual bulk density, and test the real product rather than a stand-in like rice or sand. Size the pouch around volume, not weight alone.
The Pouch Was Sized From a Capacity Estimate, Not a Real Test
Capacity charts are estimates, and they can’t account for your specific film structure, gusset depth, zipper position, or seal allowance. All of these reduce the usable space inside the pouch below what the outer dimensions suggest, sometimes by more than people expect.
Request physical size samples and fill them with your actual product at the intended fill level. Measure from the bottom panel to the practical fill line, not the external pouch height, and only lock in dimensions once a filled sample looks right on a shelf, not just on a spec sheet.
Too Much Headspace Above the Fill Line
Some headspace is necessary. It usually needs to cover:
- Room for filling without spilling or jamming the seal
- A clean heat seal, free of trapped product
- Zipper clearance and operation
- Gas release, for products like fresh coffee
But more headspace than that starts working against you. It reads as empty space on the shelf and takes away the support the product would otherwise give the top panels, which is why two pouches with the same net weight can look completely different sitting side by side.
Calculate the usable fill height first, including the zipper and seal zone, then trim any height above that which isn’t doing a job.
Settling and Normal Fill Variation Change How Full It Looks
Transport and routine handling cause most bulk products to settle into a smaller space than they occupied right after filling. On top of that, normal filler variation means one pouch can come out slightly fuller than the next, even at the same target weight, so a customer comparing two units on a shelf might genuinely be holding two different fill levels.
Test your minimum, target, and maximum production fill weights, and check the pouch again after a settling and vibration test, not just straight off the line.
Quick fixes for a low-fill pouch:
- Confirm the correct net weight actually matches the pouch size you chose
- Measure the product’s bulk density instead of relying on a general chart
- Record the settled volume, not just the fresh fill straight off the line
- Check the usable fill height, with the zipper and seal allowance included
- Trim unnecessary headspace that isn’t doing a job for sealing or gas release
Is It the Pouch, the Product, or the Process?
Changing your pouch design won’t fix a problem that’s actually coming from your filling line or your shipping process. A few quick signs point you in the right direction before you spend money on the wrong fix.
It’s likely the pouch design if:
- Most samples lean the same direction, every time
- The base is clearly too narrow for the pouch’s height
- The pouch still looks underfilled at the correct target weight
- Empty samples already show gusset or corner problems before filling starts
It’s likely the product if:
- Density changes noticeably between batches
- The contents settle a lot after filling
- A substitute test product behaves differently than the real one
- Different formulations of the same product perform inconsistently
It’s likely the filling process if:
- Hand-filled samples stand correctly but machine-filled ones don’t
- Fill weights vary more than expected between units
- The problem started right after a machine speed or setting change
- Product ends up in the sealing area more often than it should
It’s likely shipping or storage if:
- The pouch stands fine before case packing
- It leans or collapses only after delivery
- Lower pallet layers show more damage than upper ones
- Cases arrive with visible crushing or shifted contents
Most of the time it’s more than one of these at once, so it’s worth checking all four before you settle on a fix.

Test Before You Commit to a Full Production Run
A pouch shouldn’t get approved off a single visual check on the day it was filled. Before you place a full order:
- Test with the actual product, not a substitute. Density, particle shape, and moisture all behave differently from stand-ins like rice, and a pouch that stands with rice can still lean with the real thing.
- Test your minimum, target, and maximum expected fill weights. The pouch needs to hold up across normal production variation, not just one ideal number.
- Check that every corner touches the surface and the pouch doesn’t rock or lean when you set it down on a flat surface.
- Run a settling test: fill, seal, let it rest, then tap or gently vibrate it before rechecking the shape and fill line.
- Check shelf stability again after 24 hours, and again after opening and resealing, since a pouch can change shape after its first use.
- Test the actual shipping configuration, including carton size, pouch orientation, and stacking pressure, before you trust the pouch to travel well.
Important note: Always approve the final laminate, not a prototype made from a different film. Suppliers sometimes build early samples from whatever stock film is on hand, and a pouch that stands perfectly in that lighter test material can still lean or collapse once you switch to the actual production laminate.
Common Mistakes That Cause These Problems in the First Place
Most of the problems in this guide come back to one of these. None of them are hard to fix once you know to look for them.
- Sizing the pouch by product weight instead of measured volume.
- Skipping a real fill test before approving dimensions.
- Assuming a flat bottom shape is automatically stable at any size.
- Choosing film by thickness alone instead of checking actual stiffness.
- Approving a prototype made from a different laminate than the final run.
- Never testing the pouch inside its actual shipping case.
- Ignoring how the product settles after the first 24 hours.
- Treating a one-time visual check as proof the pouch design is finished.
Any one of these on its own can cause a whole production run to lean, collapse, or look underfilled, and most of the time it’s a mix of two or three working against each other at once.
Conclusion
Most flat bottom pouch problems trace back to the same handful of variables. Leaning usually relates to pouch balance, uneven filling, or gusset formation, and it’s almost always visible on an empty sample before you ever fill one. Collapse usually relates to insufficient internal support, excessive dimensions, or weak laminate stiffness, and it tends to show up first at your lowest normal fill weight. Low-fill appearance usually relates to bulk density, settling, headspace, or an inaccurate capacity selection, more often than an actual filling mistake.
None of these get solved by adjusting dimensions alone. A reliable flat bottom pouch has to be designed around the actual product, its settled volume, the target fill weight, the final laminate, the filling equipment, and the shipping conditions it will actually face. Get any one of these wrong, and the same problem tends to come back on the next production run, no matter how many small tweaks you make around it.
Test Your Flat Bottom Pouch Before Full Production
Do not approve a pouch using estimated dimensions alone. Test the actual product, final fill level, production material, and shipping configuration before placing a full order. Flexible Pouches can adjust your pouch’s dimensions, gusset depth, and material to match your product’s real filling and shelf-stability needs, and build you a sample to test before a single unit goes into full production.
FAQs
1- Why does my flat bottom pouch lean to one side?
Usually the base is too narrow for the pouch’s height, or the product filled one side more than the other during the fill process. Check that both gussets opened fully and that the product settled evenly before sealing, since either one on its own is enough to cause a lean.
2- Why does my flat bottom pouch keep falling over despite having a flat base?
A flat base only helps if the footprint is wide enough for the fill weight sitting above it. A tall, narrow pouch with a heavy product can still tip, even with a proper flat bottom construction, because the base and the height need to be balanced against each other.
3- What causes a flat bottom pouch to collapse after filling?
Usually the fill level is too low to support the panels, the pouch is oversized for the product, or the film isn’t stiff enough to hold the shape. Settling during shipping can also bring on a collapse that wasn’t visible right after filling, so it’s worth checking the pouch again after transit.
4- Why does my flat bottom pouch look underfilled at the correct net weight?
Weight and volume aren’t the same thing. A dense product can weigh the target amount while filling less of the pouch than a lighter product would, and settling after transport lowers the visible fill line even further.
5- Can changing the pouch size or film structure improve pouch stability?
Yes, but only if it’s based on a real test with your actual product. Adjusting the base width, gusset depth, or laminate stiffness around your product’s measured weight and volume is what actually fixes it, rather than guessing at a new size.
6- Why does a flat bottom pouch stand after filling but tip over after shipping?
This usually points to settling or transit pressure rather than the pouch design itself. The product moves into a smaller space during transport, which shifts the center of gravity and can bring on a lean or a tip that wasn’t there when the pouch left the factory.