


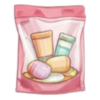


Choosing custom pouch packaging is not just selecting a width and height. The right pouch size affects how your product fills, seals, stands on the shelf, ships, and how “premium” it feels in a customer’s hands.
This guide breaks down pouch dimensions and capacity in a way that helps you choose confidently—especially when you’re ordering a custom pouch, a custom pouch bag, or planning custom pouch printing for a new product line.
Size vs capacity
One big mistake: treating “capacity” like it’s fixed.
Most “size charts” are built around a reference product. Your own product can behave very differently because capacity depends on bulk density (how much space a given weight actually takes).
That’s why a pouch size chart might work for coffee beans but fail for powders or gummies. Flexible Pouches even notes their standard sizing tables are based on coffee beans and are meant as guidelines, not guarantees.
Read dimensions correctly
For stand-up pouches, Flexible Pouches lists sizing as:
Width × Height × Bottom Gusset
That sounds simple, but here’s what brands often miss:
External vs usable space
Those dimensions are typically external (edge-to-edge). Your usable internal volume is smaller because of seals, zipper zones, and the fill line.
Height isn’t fully fillable
If you add a zipper (common in custom resealable pouches), you cannot fill up into that zipper area. Even without a zipper, you still need space at the top to seal properly.
Gusset changes everything
The bottom gusset is what creates depth and helps the pouch stand. Two pouches with the same width and height can hold very different amounts if their gussets differ.
The “fill line” rule
If you want your pouch to look right and seal right, you need headspace.
A pouch filled to the very top looks stretched, seals poorly, and can pop open under shipping pressure—a pouch filled too low looks cheap and underfilled.
A practical way to think about it:
- The pouch height is the canvas
- The fill line is the working area
- The top area is reserved for zipper + seal + tear notch
When you’re sizing a pouch bag packaging project, the fill line is more important than the total height.
Density drives capacity
This is where “ounces” becomes confusing.
If you put 250g of coffee beans and 250g of protein powder into two pouches, the powder usually needs less space than the beans because it packs more densely. That’s why many packaging guides highlight density as a key sizing factor.
So, capacity decisions should be made based on your product’s bulk density, not generic weight labels.
How to calculate the right volume
You don’t need lab equipment. You need a repeatable method.
Step 1: Measure product bulk density
Do this at home or in your facility:
- Take a measuring cup (or any container with a known volume).
- Fill it naturally (don’t compress unless your real filling process compresses).
- Weigh the product.
- Repeat 2–3 times and average.
Now you know how many grams fit in 1 cup (or 1 liter). That tells you how much volume your target pack size needs.
Step 2: add realistic headspace
Add extra volume for:
- sealing space (always)
- zipper clearance (if resealable)
- settling during shipping (chips and granola settle a lot)
This step is what makes your pouch feel “right” in real life.
Choose the pouch type first
Different types of pouches change how sizing behaves and how the pack looks.
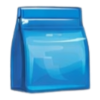
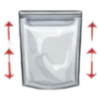
Stand-up
Best “default” for most products. Flexible Pouches supports fully customizable width, height, and bottom gusset.
This format is the workhorse of flexible pouch packaging.

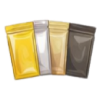
Flat bottom
More structured, more premium shelf presence. Often chosen when your brand wants a boxy feel and stronger retail stance (coffee, pet treats, premium foods).

Lay-flat
Good for samples, single-serve, slim items, and anything not intended to stand. FlexiblePouches supports custom width and height for lay-flat as well.

Retort
If your product is heat-processed, retort structures matter. Flexible Pouches offers retort pouch packaging with customizable sizing and material options.

Starting sizes that work
Flexible Pouches provides dielines for common pouch sizes, which helps plan artwork and layout early.
Examples from their dieline table include:
- Stand-up 4 oz: 5″ × 8″ × 3″
- Stand-up 8 oz: 6″ × 9.5″ × 3″
- Stand-up 12 oz: 7″ × 11.5″ × 4″
- Flat bottom 12–16 oz: 6″ × 9″ × 3″
Use these as “starting geometry,” then validate by fill testing with your product.
Real product examples
These are not hard rules—just smart starting points you can test.
Coffee beans (retail)
Coffee beans take up more space than you think because they don’t pack tightly. Flexible Pouches even warns that their sizing guidance was built using coffee beans as the reference.
A common approach is choosing a stand-up or flat-bottom pouch that allows headspace for sealing and optional degassing features.
Protein powder (dense)
Powders often pack more efficiently than beans or snacks. That means you can often use a slightly smaller-looking pouch for the same weight, while still leaving proper headspace.
Chips, granola, dried fruit (high air)
These products “trap air” and settle later. If you pick a pouch that looks perfect during filling, it may look half-empty after shipping. These categories usually need more volume than their weight suggests.
Liquids and sauces
Liquids behave differently: you’re sizing for controlled pouring and seal security. A spout pouch typically needs a shape that supports grip and avoids bulging.
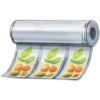
Material matters for capacity too
Your pouch material isn’t just protection—it can affect stiffness and shelf feel.
Flexible Pouches compares metalized films and aluminum foil and notes that aluminum foil generally provides stronger moisture and oxygen barrier performance.
They also explain in their material descriptions that foil structures can block nearly all oxygen, water vapor, and light.
Practical takeaway:
- If your product is highly sensitive (coffee, fats, oxygen-sensitive ingredients), material choice can matter as much as size.
- If you’re balancing performance and cost, metalized structures can be a strong middle ground.
For custom food pouch packaging, this is critical—because shelf life is packaging performance, not marketing.
Printing and layout
A pouch can be “the correct size” and still fail if the artwork isn’t built for it.
Flexible Pouches provides a “Setting Up Your Art” page and dieline references—meaning your custom pouch printing should be built on the exact dieline for your dimensions.
Here’s what sizing changes in design:
- Smaller pouches need bigger type and fewer claims.
- Larger pouches can carry more content, but the layout must stay clean.
- Flat-bottom pouches give a strong premium front panel, but side panels must be planned early.
This is why printing pouch work should start with size, not the other way around.
Mistakes that cost money
The expensive mistakes usually look like this:
- Choosing by “oz” instead of product volume (density mismatch).
- Picking a tall, narrow pouch that becomes awkward to scoop or pour from.
- Ignoring headspace and struggling to seal consistently.
- Designing artwork before confirming final dimensions and dieline.
The best sizing workflow
If you want a reliable method that works for almost every customized packaging pouch project:
- Measure how your product fills volume (bulk density)
- Pick the pouch type based on the shelf and usage
- Select a starting dimension set (like the common dielines)
- Fill test for look + sealing + handling
- Lock materials and finish for shelf life and branding
- Then, finalize custom pouch printing using the exact dieline
This approach produces fewer surprises, fewer reorders, and better shelf presence.
Closing
Choosing the right custom pouch packaging comes down to fit, function, and freshness: match dimensions to your product’s true volume (not just weight), leave enough headspace for clean sealing, and pick the right pouch material for shelf life. Do a quick fill test before finalizing, and your custom pouch printing will look better, ship better, and sell better.
Tell us your product, target weight, and pouch type — we’ll recommend the right size, material, and finish.
FAQs
1) How do I choose the right pouch size for my product?
Start with your product’s volume (density matters), then choose dimensions with enough headspace for sealing. A quick fill test is the most reliable way to confirm fit.
2) Why doesn’t pouch capacity match the “oz” label exactly?
Because different products pack differently—powders, beans, gummies, and snacks all have different densities. The same pouch can hold different weights depending on the product.
3) Can I order custom pouch dimensions?
Yes—width, height, and gusset can be customized to match your exact product and shelf goals. Custom sizing helps reduce wasted space and improves presentation.
4) What’s the best pouch material for food products?
It depends on what you’re protecting against: oxygen, moisture, light, or aroma. High-barrier structures are best for freshness, especially for coffee, snacks, and supplements.
5) Do resealable zippers affect sizing?
Yes—zippers reduce usable fill height because you can’t fill into the zipper/seal area. Always plan extra headspace so the pouch seals cleanly and looks full on the shelf.